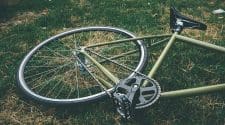
Keeping your bike in top shape is crucial for both performance and longevity. One often overlooked component that plays a significant role in the gear-shifting process is the derailleur hanger. This small metal piece holds the derailleur in place, ensuring smooth gear transitions. Failure to maintain or replace a damaged derailleur hanger can lead to poor shifting performance or even damage to other parts of the bike. Understanding how to properly maintain and replace a derailleur hanger will enhance your biking experience significantly.
Tools Required for Maintenance
Before you start the maintenance process, gather the necessary tools to make the job easier. Typically, you’ll need: – A 5mm Allen wrench – A radial or flat spanner – A bike repair stand (optional but recommended) – A torque wrench (for precise torque settings) Using these tools will make it easier to inspect and replace the derailleur hanger efficiently. A repair stand can also help you maintain your bike at a comfortable height, making it easier to work on.
Steps to Maintain Your Derailleur Hanger
Routine maintenance of your derailleur hanger involves inspecting it regularly and making minor adjustments when necessary. One of the first steps is to check for misalignment. Place your bike on a stand and reference the hanger alignment tool. This tool allows you to determine any bends or deviations in the hanger’s position. If you notice a minor bend, you can often correct it by hand, but it requires caution. Grab the hanger gently and adjust it back into position without applying excessive force. If it’s beyond minor repair, consider looking into reliable resources like Elanusparts.com for quality replacement hangers. Accessing the right part will ensure your bike remains in optimal working condition. After realigning or replacing the hanger, check the derailleur’s functionality by shifting through gears. Pay attention to any stiffness or skipped shifts, and make adjustments. You might need to see a professional if the shifting isn’t smooth even after maintenance.
Signs That Replacement is Necessary
Sometimes maintenance isn’t enough, and you’ll have to replace the derailleur hanger. Here are a few signs indicating that a replacement is necessary: – Severe bends or cracks in the hanger – Inability to achieve proper gear alignment – Rough or erratic shifting If you experience any of these issues, it is time to consider replacing your derailleur hanger. Ignoring these signs can lead to more significant issues down the line, including damage to the derailleur, frame, or drivetrain.
How to Replace a Derailleur Hanger
Replacing a derailleur hanger is a straightforward process if done with care. Start by removing the rear wheel and detaching the derailleur. Use your 5mm Allen wrench to loosen the bolts holding the hanger in place and gently remove it. Take the new hanger and align it perfectly with the mounting points. Tighten the screws securely, but avoid overtightening. Before reassembling, ensure there are no debris or old grease residues. Reinstall the derailleur and the rear wheel. After the installation, check shifting performance by cycling through the gear ranges. Adjust as necessary until everything functions smoothly.
Final Checks and Maintenance Tips
After maintenance or replacement, perform a thorough check of your bike. Make sure that everything is secure and functioning properly, including the chain and gear adjustments. Additionally, it’d be wise to establish a maintenance schedule. Regular cleanings and inspections prevent future problems and extend the lifespan of your bike components. Also, consider keeping a log of your maintenance activities. Taking notes on what you’ve done will help you recognize patterns and stay on top of your bike’s health. Engaging in preventative maintenance means you’ll enjoy safer and more enjoyable rides.

Keeping your derailleur hanger well-maintained or replacing it when necessary is essential for smooth gear shifting and overall bike performance. This small component plays a crucial role in your cycling experience, so understanding how to inspect, maintain, and replace it can save you time and prevent costly damage. Regularly checking for alignment, watching for signs of wear, and addressing issues early will ensure your bike operates at its best. With the right tools, knowledge, and a routine maintenance schedule, you’ll enjoy safer, smoother rides and a longer lifespan for your bike’s components.
Photos – © SoCalCycling.com


