


The best gravel bike configuration matches your actual route, not the bike industry’s current favorite.
Three quick starter specs to orient your build:
- All-round adventure: 1x 40T + 10-50 cassette, 700c × 42mm tubeless, 28–32 PSI
- Road-to-gravel racer: 2x 48/31 + 11-34 (Shimano GRX or SRAM AXS), 700c × 38mm, 32–36 PSI
- Loaded bikepacker: 1x 38T + 10-52 cassette, 650b × 47mm tubeless, 22–26 PSI
Before swapping any parts, confirm your frame’s tire clearance, your hub’s freehub standard (HG11, Micro Spline, or XDR), and your rim’s internal width. Those three checks prevent the most common compatibility dead ends.
Pro Tip: Start with tires. A $60 tire swap changes ride quality more than a $300 groupset upgrade on most gravel routes.
Key Takeaways
The most effective gravel bike setup starts with your terrain and goals, then works backward to drivetrain, tires, and geometry rather than forward from brand preferences.
| Point | Details |
|---|---|
| Terrain drives drivetrain choice | Choose 1x wide-range (10-52) for steep or technical routes; 2x sub-compact (46/30 × 11-34) for fast mixed terrain. |
| Tire pressure is the highest-leverage change | Start with the weight-and-width table, then tune by 2 PSI increments for surface and load. |
| Gear steps matter as much as range | 2x setups deliver 8–12% steps vs. 15–20% for wide 1x cassettes; that gap affects cadence on rolling terrain. |
| Upgrade tires before suspension | Wider tires at lower pressure deliver more comfort per dollar than a suspension fork or seatpost for most riders. |
| Test loaded before you commit | A 30-minute test ride with full bags validates handling, clearance, and gearing before a multi-day route. |
Table of Contents
- How does your route profile determine the right setup?
- What are the real differences between 1x and 2x drivetrains?
- Practical gearing: which chainring and cassette combinations actually work?
- How do you match wheel size, tire width, and pressure to your surface?
- Which geometry numbers actually change how your gravel bike handles?
- When does suspension actually improve a gravel ride?
- How do you adapt your setup for multi-day or loaded rides?
- What maintenance schedule keeps a gravel drivetrain reliable?
- Three ready-to-run gravel builds for common rider profiles
- The ride-first approach is the only approach that holds up
- Sources
How does your route profile determine the right setup?
Matching your gravel bike configuration to the terrain you actually ride is the single most reliable decision framework. Work through these five questions before touching a component:
- Primary surface mix: Hardpack doubletrack and gravel roads favor narrower, faster tires (35–40mm) and tighter gearing. Loose, rocky, or rooted singletrack demands volume and grip (42–50mm) plus low-end gearing.
- Steepest/longest climb: If your hardest section exceeds 12–15% grade for more than a mile, you need a bailout gear below a 1:1 ratio. A 38T chainring with a 52T cog gives you roughly 0.73:1.
- Ride remoteness: The farther from a bike shop, the more you should favor mechanical simplicity. A 1x drivetrain with a clutch derailleur has fewer adjustment points to fail mid-route.
- Typical load: Add a frame bag, handlebar roll, and food and your bike gains 10–20 lbs. That shifts optimal tire pressure down by 3–5 PSI and makes low gearing non-negotiable.
- Speed vs. comfort priority: Racing or fast group rides push you toward 700c, narrower tires, and 2x gearing. Long solo days push you toward wider tires and a more relaxed cockpit.
Before committing to any parts swap, run three practical checks: measure frame clearance at the chainstay and fork crown with a tire mounted, confirm your rear hub’s freehub body matches your target cassette standard, and verify your rim’s internal width supports the tire width you want (a 21mm internal rim is the minimum for a 40mm tire; 25mm internal is better for 45mm+).
According to FieldScout’s gravel setup guide, route-specific checklists that align rider priorities with setup notes consistently produce better outcomes than brand-driven choices.
What are the real differences between 1x and 2x drivetrains?
According to BicycleNest, a 1x system uses a single narrow-wide chainring that alternates tooth profiles to grip the chain without a front derailleur, paired with a wide-range cassette and a clutch rear derailleur that adds chain tension to prevent drops on rough terrain.
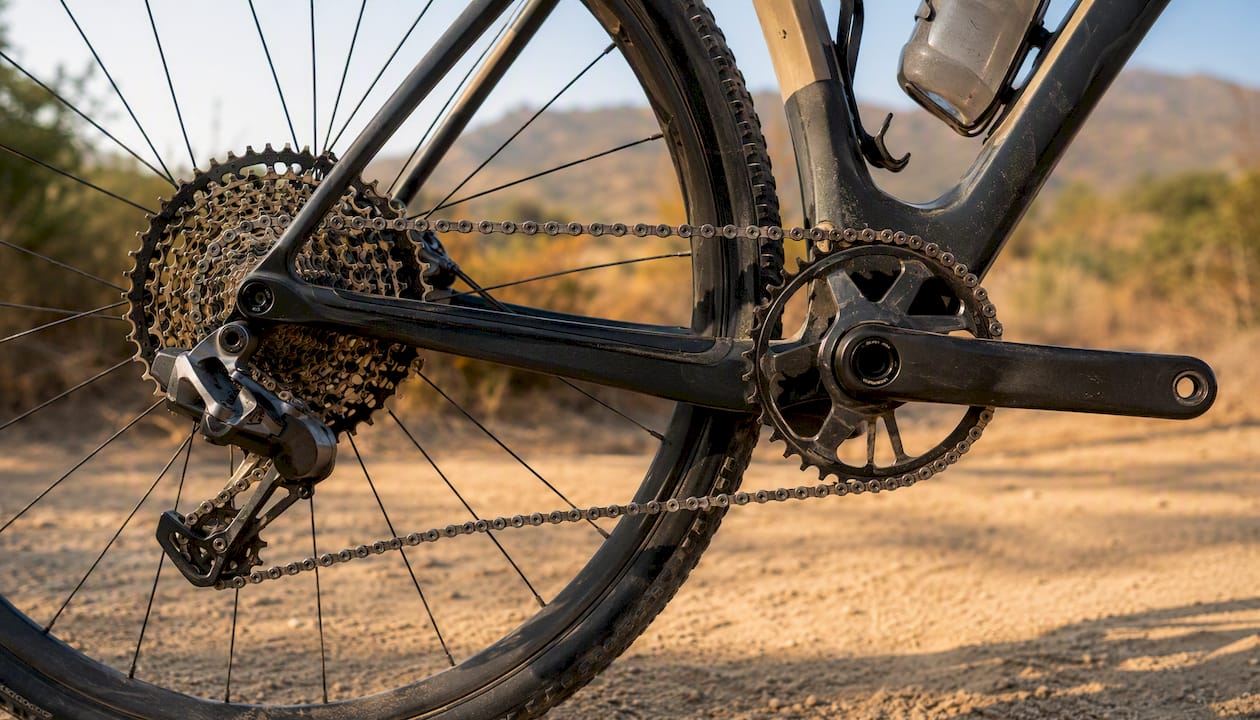
| Feature | 1x (e.g., 40T × 10-52) | 2x (e.g., 46/30 × 11-34) |
|---|---|---|
| Total gear range | 520% | ~480% |
| Gear step size | 15–20% between cogs | 8–12% between cogs |
| Chain retention | Narrow-wide + clutch derailleur | Front derailleur cage |
| Tire clearance impact | Maximized (no FD cage) | Reduced by FD cage |
| Mechanical complexity | Lower | Higher |
| Weight | Lighter | Slightly heavier |
| Best terrain | Technical, steep, bikepacking | Fast mixed, road-to-gravel |
CrankSmith’s 2026 numbers show that typical 1x wide cassettes produce gear steps of 15–20%, while 2x setups with an 11-34 cassette stay in the 8–12% range. On steep climbs or rough descents, the difference is far less noticeable.
Real-world suitability still depends on your terrain.
Practical gearing: which chainring and cassette combinations actually work?
Groupset families from Shimano GRX, SRAM AXS/XPLR, Campagnolo Ekar, and MicroShift each cover the gravel gearing spectrum, but the numbers that matter are chainring size and cassette range.
- 1x all-round (38–42T): A 40T chainring with a 10-50 cassette gives a lowest ratio of 0.80:1 and a highest of 4.0:1, covering most US gravel terrain without extreme weight penalty.
- 1x steep/bikepacking (38T): Drop to a 38T chainring with a 10-52 cassette for a 0.73:1 bailout gear. Shimano GRX uses Micro Spline freehub for its 10-51 cassette; SRAM XPLR uses XDR for its 10-52.
- 2x sub-compact (46/30 or 48/31): Paired with an 11-34 cassette, a 46/30 setup delivers a range near 480% with steps of 8–12%. Cyclist’s gearing guide highlights Campagnolo Ekar’s 13-speed single-ring configuration and the 48/31 + 11-34 combo as strong all-round choices.
- Freehub compatibility: HG11 (standard Shimano) handles cassettes up to 11-34 or 11-36. Micro Spline is required for Shimano’s 10-51. XDR is required for SRAM’s 10-52 and XPLR cassettes. Swapping cassette families often means a new rear wheel or hub swap.
- Quick range calculation: Divide the largest cog by the smallest cog, then multiply by 100 for percent range. A 10-52 cassette gives (52÷10) × 100 = 520% range. An 11-34 gives (34÷11) × 100 = 309% range, but the 2x front shift adds the second chainring’s contribution.
How do you match wheel size, tire width, and pressure to your surface?
BikeRadar’s buyer guide makes the case clearly: gravel setups are dynamic, and swapping tires for different routes is normal practice, not a sign of indecision. Start with the right wheel diameter and build from there.
700c vs. 650b: 700c rolls faster on hardpack and fits tires up to roughly 45mm on most frames. 650b accepts tires from 40–53mm and sits lower to the ground, which suits technical terrain and heavy loads. The choice often comes down to frame clearance.
- 35–40mm: Fast hardpack, gravel roads, road-to-gravel events
- 40–44mm: Mixed surfaces, light singletrack, all-day adventures
- 45–50mm+: Technical terrain, bikepacking, loose or muddy conditions
Always leave 4–5mm of clearance between the mounted tire and the nearest frame surface. Go tubeless. Lower pressures, self-sealing puncture protection, and better traction make tubeless the default choice for gravel.
Tread selection: InTheKnowCycling’s tire guide categorizes gravel tires into three classes: semi-slick (fast on hardpack, poor in mud), small-knob (the best all-round choice for mixed surfaces), and big-knob (maximum grip on loose or wet terrain). Deep knobs are not always faster on hard, rocky surfaces because large knobs cannot deform to increase contact patch; a moderate all-round tread is often quicker and more predictable on mixed rocky terrain.
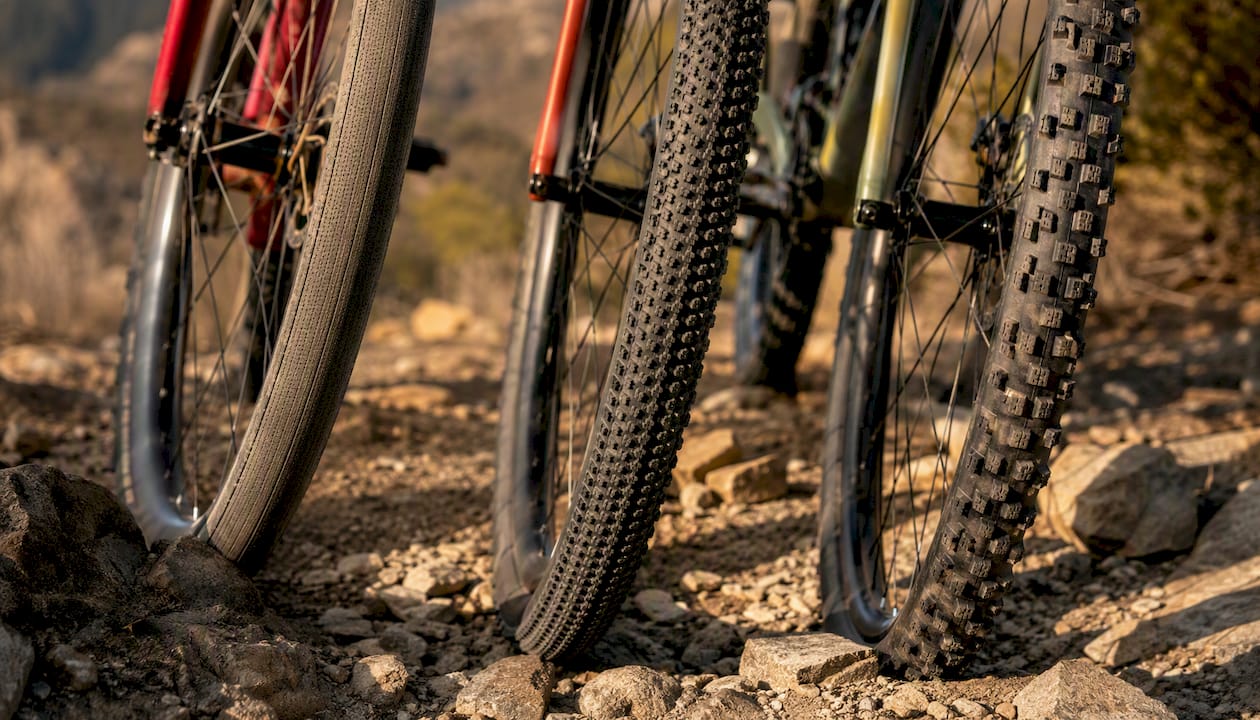
Starting tire pressure by rider weight and tire width:
| Rider Weight | 38mm Tire | 42mm Tire | 47mm Tire |
|---|---|---|---|
| Below 150 pounds | 28–32 PSI | 28 PSI | 22–26 PSI |
| 150–175 pounds | 30–35 PSI | 26–30 PSI | 22–26 PSI |
| 175–210 pounds | 32–36 PSI | 28–32 PSI | 28 PSI |
| Above 210 pounds | 36–42 PSI | 32–36 PSI | 28–32 PSI |
Tune by 2 PSI increments based on surface and feel. BikeTips notes that tire pressure is often the highest-leverage setup change for ride quality.
Which geometry numbers actually change how your gravel bike handles?
Geometry shapes every ride quality decision. BikeTips’ geometry guide gives concrete gravel-specific ranges:
- Head-tube angle: Gravel bikes typically run 70–72.5°, compared to 73–74° on road bikes. Slacker angles add stability at speed on rough terrain; steeper angles sharpen steering response.
- Trail: The 60–70mm range suits most all-round gravel riding. Below 55mm feels twitchy on descents; above 75mm can feel sluggish in tight switchbacks.
- BB drop: A 70–75mm drop lowers your center of gravity for stability without sacrificing pedal clearance on rough surfaces.
- Chainstay length: 425–440mm is the gravel sweet spot. Shorter stays increase agility; longer stays add stability under load and improve straight-line tracking on loaded bikepacking routes.
- Reach and stack: These two numbers define your actual riding position more accurately than frame size alone. A longer reach stretches you out for aerodynamics; a higher stack raises the front end for comfort on long days.
For a race-oriented build, prioritize a steeper head angle and shorter reach. For bikepacking or all-day comfort, favor a slacker head angle, longer chainstays, and higher stack.
When does suspension actually improve a gravel ride?
Most gravel riders get more from tires and pressure than from any suspension component. That said, specific terrain and ride goals do justify the added weight and complexity.
- Short-travel suspension fork (30–50mm): Worth considering for technical singletrack, bikepacking routes with extended rough sections, or riders with wrist or shoulder issues. Adds 300–500g over a rigid carbon fork.
- Suspension seatpost (e.g., Redshift ShockStop, Lauf Anywhere): A better first upgrade than a fork for most riders. Absorbs road buzz and sharp hits without changing handling, and adds roughly 100–200g over a standard post.
- Dropper post: Genuinely useful on technical descents and bikepacking routes with frequent elevation changes. Fitting requires adequate seat-tube length and internal routing compatibility.
Pro Tip: Upgrade in this order: wider tires at lower pressure first, then a suspension seatpost, then a fork or integrated system. Each step costs less and delivers more than skipping ahead.
The BH iGravelX Carbon is one example of a frame designed with tire clearance and geometry that accommodates both rigid and suspension-fork configurations, giving you flexibility as your terrain preferences evolve.
How do you adapt your setup for multi-day or loaded rides?
Optimizing only for average terrain creates failure points on the hardest sections of a route. Build your loaded setup around the worst mile, not the typical mile.
- Lower gearing: Drop one chainring size (e.g., 40T to 38T) or step up to a 10-52 cassette before adding weight. A loaded bike on a 15% grade needs every bailout gear available.
- Wider tires at lower pressure: Move up one tire width category and drop 3–5 PSI from your unloaded baseline. A 42mm tire at 28 PSI handles load better than a 38mm tire at 32 PSI.
- Mass distribution: Keep heavy items low and centered. Seat bags and frame bags outperform handlebar rolls for handling stability.
- Cockpit adjustments: A shorter stem (80–90mm vs. 100mm) and a 5–10mm stem riser improve comfort on long days without sacrificing control.
- Pre-ride test load: Ride your fully loaded bike for at least 30 minutes before committing to a multi-day route. Check for heel strike on bags, brake cable clearance, and handling feel at low speed.
For fueling strategy on loaded rides, long-distance cycling nutrition guidance is as important as the mechanical setup.
What maintenance schedule keeps a gravel drivetrain reliable?
Gravel conditions accelerate wear on every component. A short, consistent schedule prevents most mid-ride failures.
- Every ride: Check tire pressure, thru-axle torque (typically 12–15 Nm), and brake pad clearance.
- Every 200–300 miles: Clean and lubricate the chain. Inspect the rear derailleur clutch engagement.
- Every 500–1,000 miles: Measure chain wear with a chain checker. Replace before the chain reaches 0.5% elongation to protect the cassette and chainring.
- Every 1,500–2,000 miles (or seasonally): Replace tubeless sealant (most sealants dry out in 3–6 months). Inspect tire beads for cuts or deformation.
- 2x-specific: Front derailleur cable tension drifts on rough terrain. Re-index after every 3–4 rough rides.
For remote rides, carry a chain quick-link, a tire plug kit (Dynaplug or similar), a CO2 inflator or mini pump, and a multitool with a chain breaker. A clutch rear derailleur (standard on Shimano GRX, SRAM XPLR, and Campagnolo Ekar) reduces chain-drop risk significantly on rough terrain.
- Tubeless sealant: top up every 2–3 months; replace fully every 6 months
- Brake pads: inspect every 500 miles; replace before the pad compound reaches the metal backing
- Cables and housing: replace annually or when shifting becomes inconsistent
Three ready-to-run gravel builds for common rider profiles
These builds reflect the ride-first approach. Match your profile, then adjust one variable at a time based on your specific route. Check gravel race event examples to see how these setups map to real US course types.
All-round adventure build
- Drivetrain: Shimano GRX 1x, 40T chainring, 10-50 cassette (Micro Spline hub)
- Wheels/tires: 700c, 25mm internal rim, 42mm small-knob tubeless at 26–30 PSI
- Cockpit: 12° flare drop bar, 100mm stem, 40–42cm width
Road-to-gravel racer build
- Drivetrain: SRAM AXS 2x, 48/31 chainrings, 10-36 cassette (XDR hub)
- Wheels/tires: 700c, 23mm internal rim, 38mm semi-slick tubeless at 30–35 PSI
- Cockpit: 16° flare drop bar, 90–100mm stem, 38–40cm width; aerodynamic bar tape
Loaded bikepacking / steep-terrain build
- Drivetrain: SRAM XPLR 1x or Campagnolo Ekar 1x, 38T chainring, 10-52 cassette
- Wheels/tires: 650b or 700c, 25mm+ internal rim, 47mm big-knob tubeless at 22–26 PSI
- Cockpit: 20° flare drop bar, 80–90mm stem, 42–44cm width; dropper post if frame allows
CrankSmith’s 2026 analysis confirms that 1x configurations dominate new gravel model releases, making parts availability for SRAM XPLR and Shimano GRX 1x stronger than ever for US riders.
The ride-first approach is the only approach that holds up
At Socalcycling, we cover gravel events from Southern California to national-level races, and the pattern we see consistently is this: riders who configure their bikes around their actual routes outperform riders who chase spec sheets.
But trend-following without terrain context is how riders end up spinning out on fast descents or grinding to a halt on steep climbs. The three builds above are starting points, not permanent configurations. Swap tires for the season, adjust cassette range for a new route, and test every loaded setup before committing to a multi-day trip.
Gravel riding rewards adaptation. The riders who get the most from their setups treat their bike as a tunable system, not a fixed product. That mindset, more than any single component choice, is what separates a good gravel ride from a great one.
Sources
The following resources support specific claims and calculations throughout this guide. Use them for component compatibility checks, deeper gear-range math, and tread selection by surface class.
- Gravel Bike Gearing Options: 1x vs 2x Drivetrains Compared
- 1x vs 2x on Gravel in 2026: The Actual Numbers | CrankSmith Blog
- BikeRadar buyer’s guide (2024)
- Best gravel tires | InTheKnowCycling
For event-specific setup context and to connect with the broader gravel community, Socalcycling covers race results, course profiles, and product reviews across the US gravel calendar. The cycling event category guide is a useful next read if you are aligning your build to a specific race format.
Recommended
- Why Gravel Events Have Different Categories: 2026 Guide
- How to Find Gravel Races Near Me in 2026
- Gravel Race Event Examples Across the United States
- California Cycling Route Examples for Every Terrain